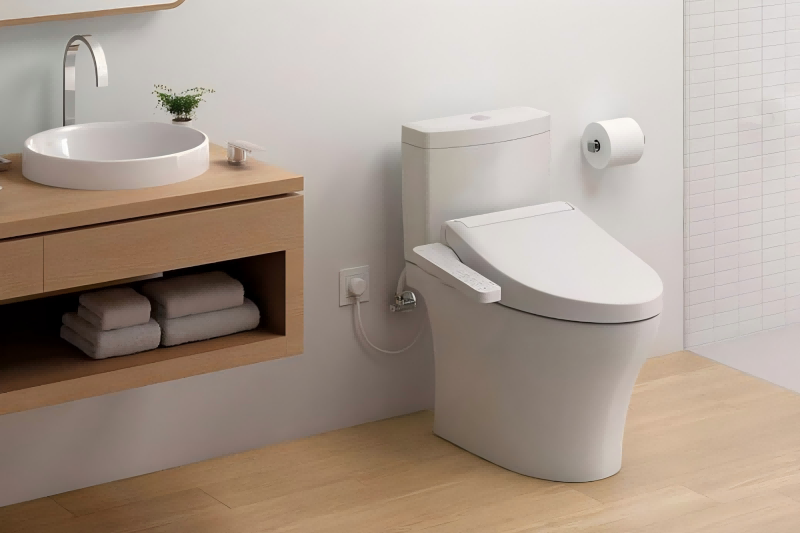
Installing a Toilet Braided Hose is easy to do yourself. Most people think this job is simple with good instructions. Stainless steel braided hoses last a long time and are fast to put in. People want a safe, leak-free connection in their homes. Doing the work themselves makes people feel proud and helps them save money.
- People say it is easy to install with clear steps.
- Braided hoses last long and are simple to use.
- Many like saving money and feeling proud.
Key Takeaways
- Installing a toilet braided hose is simple and can save you money. Follow clear steps to do it yourself.
- Always turn off the water supply before starting. This prevents spills and keeps your bathroom safe.
- Regularly check your toilet braided hose for leaks and damage. This helps maintain your plumbing and prevents costly repairs.
Tools and Preparation
Tools and Materials
You need the right tools and materials to start. This makes the job easier and safer. Most toilet braided hoses are a standard size. Still, you should check the length and fitting type before you begin.
You also need these items:
| Tool/Material | Purpose |
|---|---|
| Adjustable wrench | Used to tighten or loosen parts |
| Bucket or towel | Catches water that might spill |
| New braided hose | Swaps out the old supply line |
| Flashlight | Helps you see better |
Inspect Old Hose
Check the old hose before you take it off. Look for cracks, rust, or bulges on the hose. See if the fittings have leaks or are rusty. If the hose feels hard or breaks easily, you must replace it. Checking first helps stop leaks and water damage later.
Tip: Always turn off the water before you touch the hose.
Safety Tips
Handling the braided hose the right way keeps you safe and helps the hose last longer. You should:
- Do not twist or bend the hose too much.
- Be gentle and never use a wrench on the hose itself.
- Look at all fittings to make sure they are not broken.
- Use two wrenches to tighten parts without twisting the hose.
- Check every connection when you finish.
If you do not handle the hose right, it can burst and spill a lot of water. This can ruin your home. Bad installation can also cause mold or even electrical problems. Working carefully stops these problems and keeps your connection safe for a long time.
How to Install Flexi Hose
Turn Off Water Supply
Before starting any toilet hose installation, always turn off the water supply. This step prevents water from spilling onto the floor. Most bathrooms have a shutoff valve behind or beside the toilet. The two most common types of shutoff valves are shown below:
| Valve Type | Description |
|---|---|
| Angled Fixture Shutoff Valve | Commonly found near sink faucets and toilets, used when a pipe comes out of the wall. |
| Straight Fixture Shutoff Valve | Used where a pipe comes up from the floor, operates similarly to the angled valve. |
To turn off the water supply, follow these steps:
- Turn the shutoff valve clockwise until it stops.
- If there is no shutoff valve, turn off the main water supply, usually found in the basement near the water meter.
- Flush the toilet tank to empty most of the water.
- Use a sponge and bucket to remove any water left in the toilet tank and bowl.
Tip: Always double-check that the water supply line is off before moving to the next step.
Remove Old Hose
To replace a toilet flexible hose, first disconnect the old flexible hose. This step keeps the plumbing safe and avoids damage. The process is simple:
- Turn off the water supply to the toilet.
- Flush the toilet tank and soak up any leftover water with a towel.
- Use an adjustable wrench to loosen the nuts at both ends of the old water supply line. Hold the valve steady with a spanner to prevent twisting.
- Unscrew the nuts by hand and remove the old hose.
- Adjustable spanners work best for holding the valve body while loosening or tightening.
- Never force the nuts, as this can damage the plumbing.
Attach Toilet Braided Hose
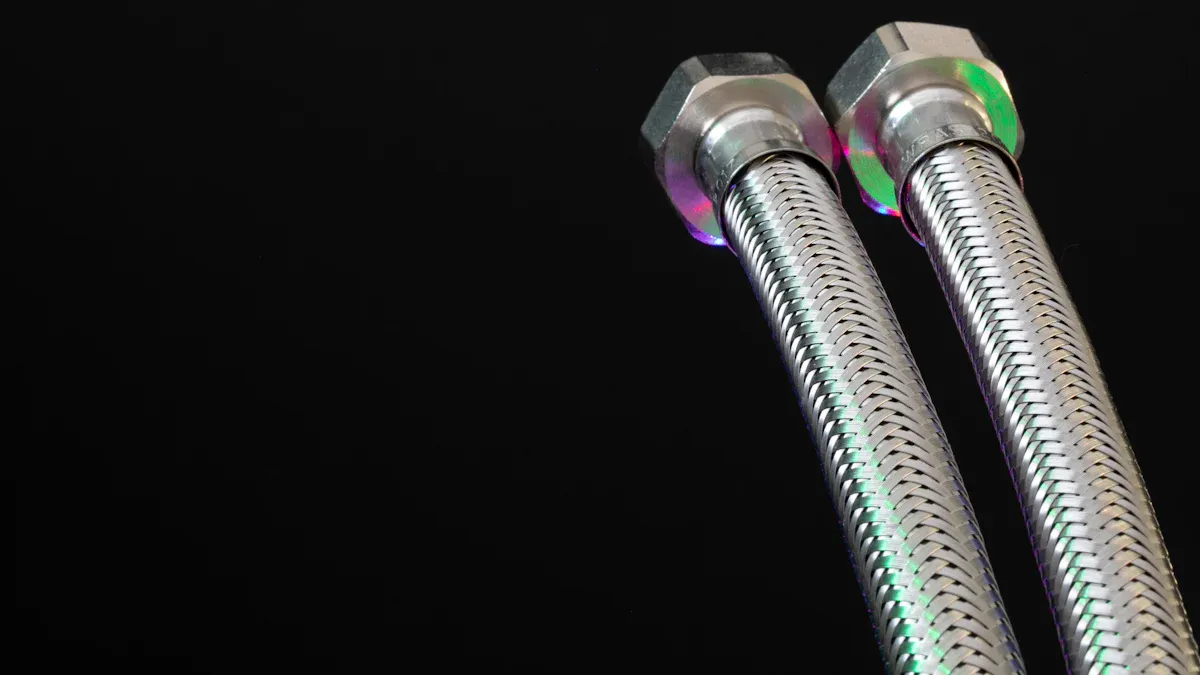
Now it is time to attach the new flexible hose. A toilet braided hose offers flexibility and strength. Many homeowners choose a braided stainless-steel flex tube for its durability. To install a toilet hose, follow these steps:
- Wrap Teflon tape around the threads of the shutoff valve. This helps create a watertight seal.
- Attach one end of the new water supply line to the shutoff valve. Tighten the nut with an adjustable wrench.
- Attach the other end of the water supply line to the toilet tank’s inlet. Make sure the connection is snug.
- Do not over-tighten. Stop when the connection feels secure.
A flexible stainless-steel supply line fits into tight spaces and bends easily. This makes it easier to install a toilet hose compared to rigid lines.
Secure Connections
Securing the connections is important for a leak-free toilet hose installation. Use these techniques:
- After the nut feels snug, turn it another 1/4 turn for a secure fit.
- Plumber’s grease on the nut and gasket can help prevent leaks.
- Always use two wrenches: one to hold the valve, one to tighten the nut. This keeps the braided hose from twisting.
- Avoid over-tightening, which can crack the toilet tank or strip the threads.
Note: A secure connection keeps the toilet supply line safe and prevents future leaks.
Turn On Water and Check for Leaks
After you install a toilet hose, turn on the water supply slowly. Watch the toilet tank as it fills. Check for any leaks at both ends of the water supply line. If you see water dripping, tighten the connections a little more. Do not over-tighten.
To check for any leaks:
- Inspect the water supply line and both connections.
- Make sure all fittings are snug.
- If a leak appears, tighten the nut slightly until the leak stops.
If leaks continue, check for these common problems:
- A missing or damaged washer inside the connection.
- Cracks in the fill valve or toilet tank.
- Over-tightened or loose connections.
- Old rubber washers that have worn out.
If tightening does not stop the leak, replace the toilet flexible hose with a new one. In areas with hard water, a braided stainless-steel flex tube resists corrosion better than plastic lines.
Troubleshooting: Always verify that the water supply line fits well and that the toilet tank connections are not cross-threaded. Use only quality hoses that meet standards like ASME # A112.18.6, cUPC, or NSF 61 for safety and durability.
A toilet braided hose makes toilet hose installation easier and safer. Flexible hoses fit tight spaces and reduce the risk of leaks. Homeowners who know how to install flexi hose can save money and keep their bathrooms safe.
Checking your toilet braided hose often and putting it in the right way stops leaks and plumbing problems. Homeowners get lots of good things from this:
- Stops water from ruining your home
- Helps the toilet work well
- Makes plumbing last longer
- Cuts down on wasted water
| Check Type | How Often to Do It |
|---|---|
| Look at the hose | Every month |
| Check if it’s tight | Twice a year |
| Think about replacing | Every year after 5-10 years |
Doing these things saves you time and keeps your bathroom safe.
FAQ
How often should someone replace a toilet braided hose?
Most plumbers recommend replacing the hose every 5 to 10 years. Regular checks help spot damage early.
Can a person install a braided hose without a plumber?
Yes. Many homeowners install a braided hose themselves. Basic tools and careful steps make the job safe and easy.
What should someone do if the new hose leaks?
Tighten the connections gently. If leaks continue, check for damaged washers or replace the hose with a new one.