Washing machine plumbing installation refers to connecting the inlet and drain hoses. Using high-quality materials, such as GONGGONG braided hoses, helps prevent leaks and extends their lifespan. Many people can complete this task with just simple tools and careful planning. Some common problems include poor drainage, incorrect inlet hose connections, and excessive noise. Following the steps helps ensure a safe and secure installation.
Key Takeaways
- Choose a sturdy, flat location to place the washing machine. This helps prevent damage and keeps it stable.
- Use high-quality hoses, such as GONGGONG braided hoses. These hoses help prevent leaks and extend their lifespan.
- Always turn off the main water valve before starting plumbing work. This helps prevent leaks and water damage.
- Comply with local drainage and water supply regulations. This ensures safety and avoids future problems.
- Regularly check hoses and connections for wear and leaks. This helps ensure the washing machine’s safe and proper operation.
Washing machine plumbing Assessing Space & Plumbing
Choosing Washer Location
Choosing a suitable location for the washing machine is crucial. The floor should be flat and firm, capable of supporting at least 400 pounds (approximately 180 kg). Hard surfaces such as tile or concrete are best, as they are less prone to damage from vibration. If the washing machine is located upstairs, use a washing machine tray with a drain outlet to prevent leaks. Ensure there is sufficient space next to the washing machine for a dryer, and that connections do not obstruct the dryer’s vent.
Other things to check:
- A shut-off valve should be provided near the hot and cold water lines.
- A good drainage system, such as a 2-inch (approximately 5 cm) riser or a floor drain with a P-trap.
- A GFCI-protected electrical outlet should be available within 3 feet (approximately 90 cm) of the washing machine.
Checking Water & Drain Lines
The washing machine requires suitable water supply and drain lines. The water supply line should be close to the washing machine. A shut-off valve helps ensure safety. The drain hose should be at least 2 inches (5 cm) in diameter. This size is more suitable to prevent blockages. Some older houses have narrower drain pipes, but wider ones are better. Riser pipes or floor drains should be connected to a P-trap. This prevents odors from entering the house.
Planning Electrical Access
The laundry room needs a safe electrical outlet. Regulations require at least one outlet in the laundry area. Washing machines and dryers must be grounded for safety. All outlets in the laundry room need GFCI protection.
“All 125V, 15a and 20a outlets in laundry rooms need GFCI protection.”
Planning these steps will help ensure your washing machine is safe and compliant with regulations.
Tools & Materials for Washing machine plumbing
Washing machine plumbing Essential Tools List
Installing plumbing for your washing machine requires the right tools. These tools will make the work easier and safer. Here are some essential tools:
- Adjustable wrench
- Pipe cutter
- Basin wrench
- Pipe bender
These tools help tighten fittings, cut pipes, and access narrow spaces. Using the right tools prevents leaks and ensures all parts are installed correctly. Good tools also help get the job done faster and reduce errors.
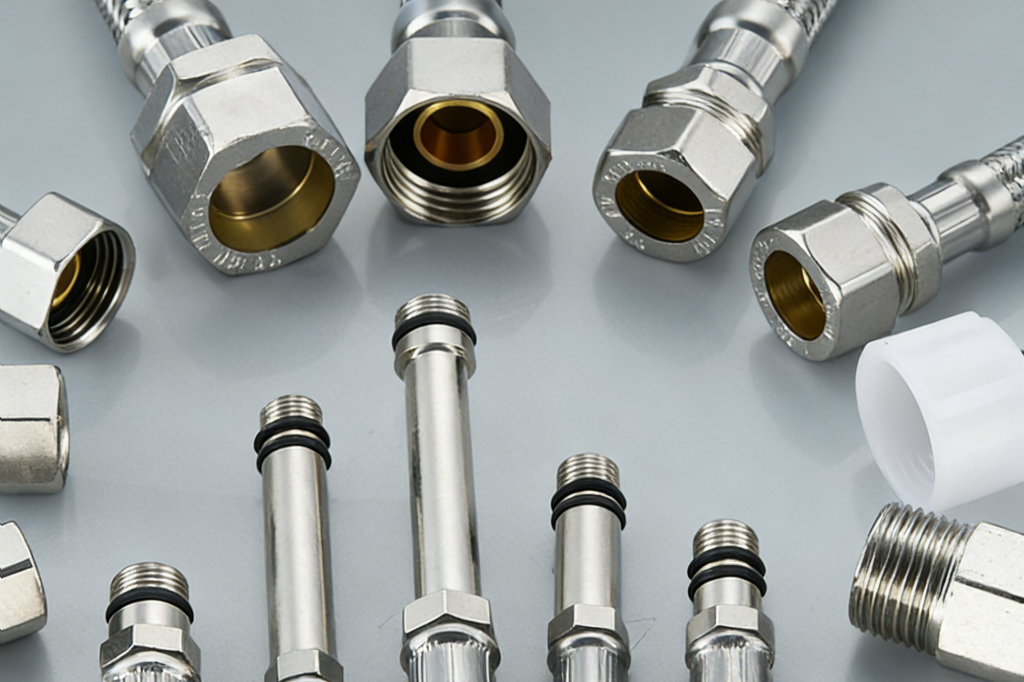
Recommended Hoses & Fittings
Choosing the right hoses and fittings is crucial for a safe and durable installation. The table below lists common hose types and their materials:
| Hose Type | Material |
|---|---|
| Inlet Hose | Rubber |
| Drain Hose | Plastic or PVC |
| Braided Hose | Rubber with steel |
Many experts recommend using automatic shut-off valves. These valves cut off the water supply in the event of a hose rupture. Users should also check that all fittings conform to US standard sizes. This helps ensure smooth water flow and ensures system safety.
Tip: High-quality hoses, such as GONGGONG braided hoses, are safer and more durable than ordinary hoses.
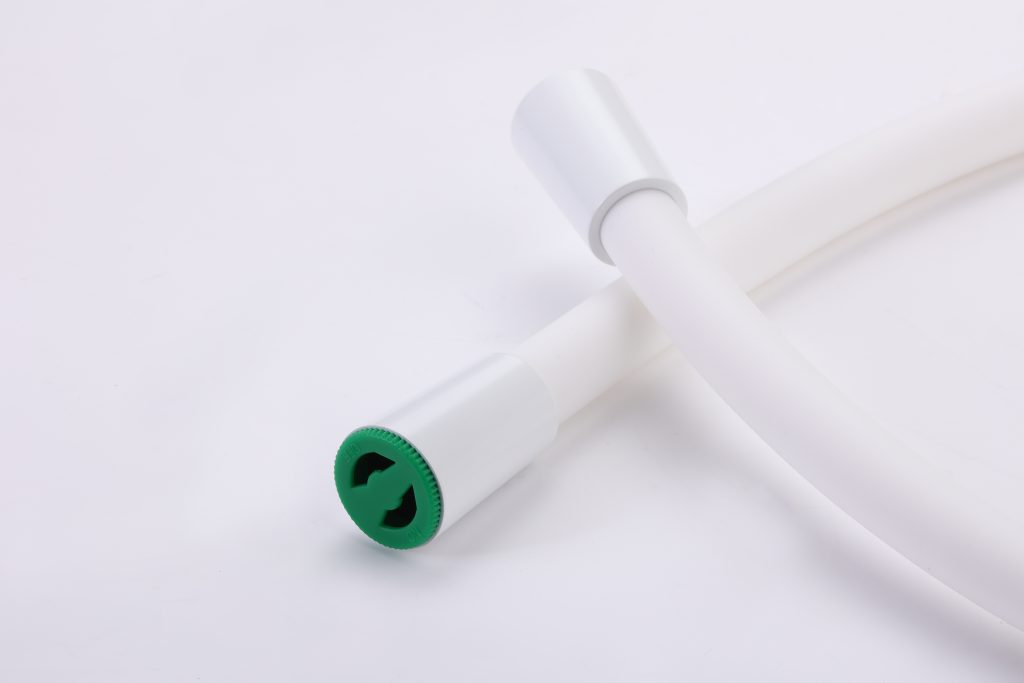
GONGGONG Braided Hose Benefits
GONGGONG braided hoses stand out for their strength and design. They are made from stainless steel and flexible polymers. Even in confined spaces, these hoses will not tangle or stretch. Users can choose different lengths and sizes to suit their needs. GONGGONG hoses are rust-resistant, durable, and have a long service life. They also have a high pressure rating, helping to prevent bursts and leaks. Each hose undergoes rigorous testing and meets global standards. It is because of these characteristics that many builders and plumbers trust GONGGONG hoses for their washing machine plumbing systems.
Plumbing for a Washing Machine: Water Supply
Turning Off Main Water
Before starting the washing machine plumbing installation, the main water valve must be closed. This step ensures the safety and dryness of the work area. The main water valve is usually located near the water inlet. Follow these steps:
- Locate the main water valve. Sometimes a valve opener is required to open it.
- Turn the valve clockwise until it stops. This shuts off the water supply.
- Open the outdoor water tap to drain any remaining water from the pipes. This step releases pressure in the pipes.
Some washing machines have hot and cold water shut-off valves at the back. Simply turn both valves clockwise to stop the water flow. Always ensure the water has completely stopped before proceeding to the next step.
Tip: Shutting off the water supply helps prevent leaks and water damage during installation.
Tapping Water Lines & Installing Valves
After shutting off the water supply, the next step in installing the washing machine piping is to connect the existing water pipes and install the shut-off valve. This step provides a separate water supply for the washing machine and facilitates future maintenance.
For best results, follow these steps:
- Check the connection of the water supply pipe to the sink or other fixture.
- Determine the location of the shut-off valve. Measure the distance from the water source to the washing machine.
- Close the main water supply valve and drain the water from the pipes (if not already done).
- Disconnect the water supply pipe from the fixture.
- Slide the compression nut and sealing ring onto the pipe.
- Wrap Teflon tape around the pipe threads for a better seal.
- Push the shut-off valve onto the pipe.
- Connect the hose to the shut-off valve and the washing machine faucet.
- Tighten all compression fittings with an adjustable wrench.
- Reconnect the water supply and check for leaks.
Plumbing codes often require the use of special fittings to ensure safety and durability. For example:
- Some areas do not allow hose fittings to be used with washing machines.
- Many codes require the use of 90-degree elbows (also known as louvers) to ensure a secure connection.
- Soldering hose fittings directly to brass elbows may not comply with codes, especially under high water pressure.
Note: Always check your local building codes or consult a licensed plumber to ensure the installation complies with all regulations.
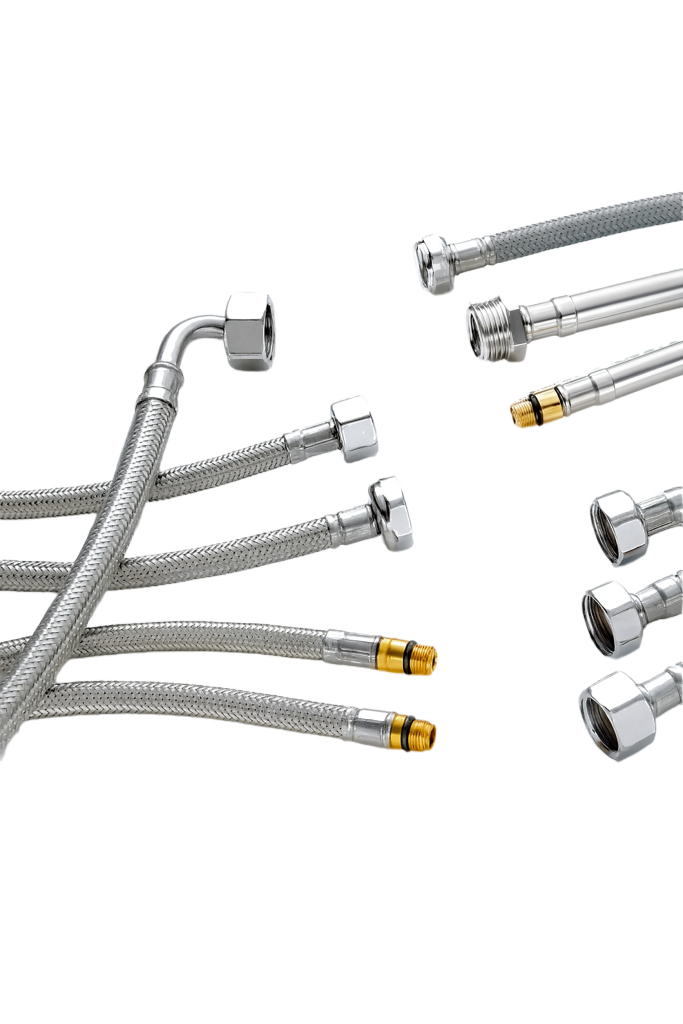
Connecting Braided Hoses
The final step is to connect the braided hose from the shut-off valve to the washing machine. High-quality hoses, such as GONGGONG braided hoses, help prevent leaks and are more durable than standard hoses. These hoses effectively prevent kinking and stretching, even in confined spaces.
Here is the best way to connect the braided hose:
- If necessary, wrap thread-locking tape around the threads of the brass water supply valve.
- Tighten the new hose by hand clockwise onto the water supply valve.
- Tighten the hose by one-quarter turns using a wrench or pliers. Do not overtighten.
- Connect the other end of the hose to the washing machine’s water inlet valve. Again, tighten by hand first, then tighten by one-quarter turns with a wrench.
- Ensure all connections are tightened. Check the hose for twists or damage.
- Slowly turn on the water supply. Check for leaks; if leaks are found, tighten the connection.
GONGGONG braided hoses offer extra safety. They are made of stainless steel and flexible polymers, combining strength and flexibility. These hoses are available in various lengths and sizes, making them suitable for a variety of installation methods. Their high-pressure rating helps prevent bursts and leaks, making them a wise choice for any washing machine installation.
Tip: Always use hoses that meet global drinking water system standards. GONGGONG hoses undergo rigorous quality testing and are trusted by many professionals.
By following these steps, anyone can establish a safe and reliable water supply system when installing washing machine tubing.
Washing machine plumbing Drainage Setup & Code Tips
Installing Standpipe & Trap
Washing machines require a proper drainage system to operate safely and prevent odors. The riser is the vertical pipe through which the washing machine drains. It connects to a P-trap, which holds water and prevents waste gas from entering the laundry area. Local plumbing regulations specify requirements for these components.
- The riser must be at least 2 inches in diameter. Some areas allow 1-1/2 inches, but 2 inches is safer and less prone to clogging.
- The riser opening should be 18 to 30 inches above the P-trap. This height prevents water overflow and helps the washing machine drain properly.
- The P-trap must be installed 6 to 18 inches above the ground. This position maintains a good water seal and prevents waste gas from entering.
- The P-trap requires a vent pipe at least 1-1/4 inches wide. The vent pipe should extend vertically upwards and then connect to the main ventilation system.
The riser and P-trap work together to ensure a safe and odor-free laundry area. The vent pipe balances air pressure and helps water flow smoothly.
Connecting to Existing Drain
Many homes connect their washing machine drain hose to their existing sink drain hose. This setup can save space and money, but it must comply with regulations to avoid problems. The drain hose must be large enough to accommodate the drainage needs of both the sink and the washing machine. Proper ventilation is also crucial.
| Advantages | Disadvantages |
|---|---|
| Space Saving | Potential Blockages |
| Cost Efficiency | Complex Installation |
| Simplified Plumbing Layout | Drainage Issues |
To comply with regulations, the minimum diameter of a shared drain hose must be 3 inches (approximately 7.6 cm). The ventilation system must also be properly installed to prevent slow drainage or unpleasant odors from emitting wastewater. Always check local regulations before sharing a drain hose. If the installation seems too complex, consult a licensed plumber.
Tip: Following regulations on hose size and ventilation ensures a safe system and helps prevent clogs.
Preventing Backflow & Leaks
Backflow can cause wastewater to enter clean water pipes. Leaks can damage floors and walls. Using appropriate fixtures helps prevent these problems with your washing machine hose.
| Device Type | Description |
|---|---|
| Air Gap | A vertical space to prevent water from flowing back into the washing machine or water supply line. |
| Pressure Vacuum Breaker Assembly | Prevents water from flowing backward at the drain connection. |
| Reduced Pressure Zone Device (RPZ) | Gives the highest level of backflow protection, blocking dirty water from re-entering the supply. |
| Double Check Valve Assembly | Uses two check valves to prevent backflow in low-risk areas. Requires annual testing. |
| Atmospheric Vacuum Breaker (AVB) | A simple device that closes the inlet when water stops flowing. Must be installed vertically. |
Always install a P-trap and vent to prevent wastewater gas from entering. Devices such as air gaps and vacuum circuit breakers further prevent backflow.
A good drainage system protects the house and ensures the washing machine functions properly. Following these tips and specifications helps prevent leaks, blockages, and odors.
Washing machine plumbing Final Steps & Testing
Attaching Hoses & Drain
Properly connecting the hose and drain ensures the washing machine is protected from leaks. Please follow these steps to ensure a secure connection:
- Connect the hot and cold water hoses to the corresponding outlets on the wall.
- If recommended by the manufacturer, install a filter screen in each hose.
- Tighten each connection by hand first, then tighten it with pliers. Do not overtighten.
- Connect the drain hose to the back of the washing machine. Ensure it is tightened securely.
- Depending on your laundry room layout, insert the end of the drain hose into the riser, sink, or floor drain.
- Check the hose for twists or knots.
- Before plugging in the power, ensure the washing machine is level.
Tip: Secure connections help prevent leaks and water damage.
Testing for Leaks & Drainage
The testing system ensures everything is functioning correctly. Users should run the test program to check for leaks and ensure proper drainage.
- Start a short wash cycle without clothes in the washing machine.
- Observe the inlet hose and drain hose during the filling and draining process.
- Check all connections for drips or leaks. Tighten any loose connections.
- Ensure the drain hose is angled downwards towards the riser. A slope of at least one inch every four feet helps ensure smooth water flow.
- Listen for unusual noises or slow drainage. These signs may indicate a problem.
- Stop the wash cycle and check for leaks again.
Note: A quick post-installation check can prevent larger problems later.
Leveling & Powering Up
A horizontally placed washing machine runs more smoothly and is quieter. It is recommended to use a level to check the washing machine.
- Place the level on top of the washing machine.
- Rotate the leveling feet until the washing machine is level in both directions.
- Check again with the level to confirm.
The power supply must match the washing machine’s wattage. The voltage and current of the outlet must be correct. If in doubt, consult a professional electrician for wiring.
A horizontally placed and correctly powered washing machine has a longer lifespan and operates quietlyer.
The plumbing for installing the washing machine requires care. Using high-quality materials and complying with local regulations helps prevent leaks and extends the system’s lifespan. Before using the washing machine, all connections should be checked. Testing the installation is crucial. If you are unsure about a step, consult an expert. This helps avoid health problems and costly repairs.
Quick Checklist:
- Ensure water supply and drainage meet specifications.
- Choose sturdy hoses and fittings.
- Check for leaks and unusual noises.
- Clean the filter and check the hoses regularly.
A safe plumbing system begins with good planning and regular checks.
FAQ
How often should I check my washing machine hose?
Check the hose every six months. Inspect for cracks or bulges. Also, check for leaks. If any damage is found, replace the hose. A high-quality hose, such as GONGGONG braided hose, helps prevent sudden problems.
Can my washing machine share a drain hose with the sink?
Yes, a washing machine can share a drain hose with the sink. The drain hose must comply with local plumbing regulations. The hose must be large enough to accommodate both. Good ventilation prevents slow drainage and odors.
What size water supply hose is best for my washing machine?
Most washing machines use a 1/2-inch water supply hose. This size hose provides sufficient water for washing. For best results, always use a hose that matches the machine’s inlet.
Why do professionals recommend braided hoses?
Braided hoses are less prone to tangling or stretching and are less likely to burst like rubber hoses. GONGGONG braided hoses are made of stainless steel and flexible polymers, making them stronger, more durable, and safer.
What should I do if my washing machine leaks after installation?
First, turn off the water supply. Check that all hose connections are secure. Inspect the hoses for damage. Replace any damaged parts. If the leak persists, contact a certified plumber for assistance.