
Many people find installing a shower hose simple and fun, something they can do themselves. Shower hoses make bathing children or pets easier and help keep the shower area clean. Choosing a high-quality hose like GONGGONG braided hoses offers even more benefits. These hoses feature a mold- and moisture-resistant design, a stylish appearance, and a comfortable feel, adding a modern touch to your bathroom. GONGGONG braided hoses are made of strong and durable materials, helping to prevent leaks and ensuring longevity. To install a shower hose, you’ll need the right hose, adapters, and some basic tools. With these, anyone can easily complete this upgrade at home.
Key Takeaways
- Choose a strong and durable shower hose like GONGGONG braided hoses. It’s durable and looks great.
- Prepare the necessary tools, such as an adjustable wrench, pliers, and hose tape. Make sure these tools are ready before you begin installation.
- Measure your faucet size. This will help you choose the right adapter and hose. Ensure the installation is secure.
- Install the hose slowly and carefully. Use new washers and hose tape. This will prevent leaks.
- Inspect and clean the hose regularly. This will keep it in good working order and extend its lifespan.
Tools and Parts for Add Shower Hose
Shower Hose Essential Tools List
Before you begin, prepare all necessary tools and parts. The right tools will make the job easier and help prevent leaks. Plumbers recommend using the following tools to install a shower hose:
- Adjustable wrench: Used to tighten or loosen connections.
- Adjustable pliers: Helps you grip and turn parts, preventing slippage.
- Washers: Ensure there are no leaks.
- Hose tape: Wrapped around threads to prevent leaks.
- Basin wrench: Allows for easy operation in tight spaces under the bathtub.
- Pipe cutter: Allows for straight cuts in pipes if necessary.
- Reciprocating saw: Allows for cutting in tight spaces.
Tip: When installing a new shower hose, always use new washers and hose tape. This helps prevent dripping.
Choosing the Right Hose and Adapter
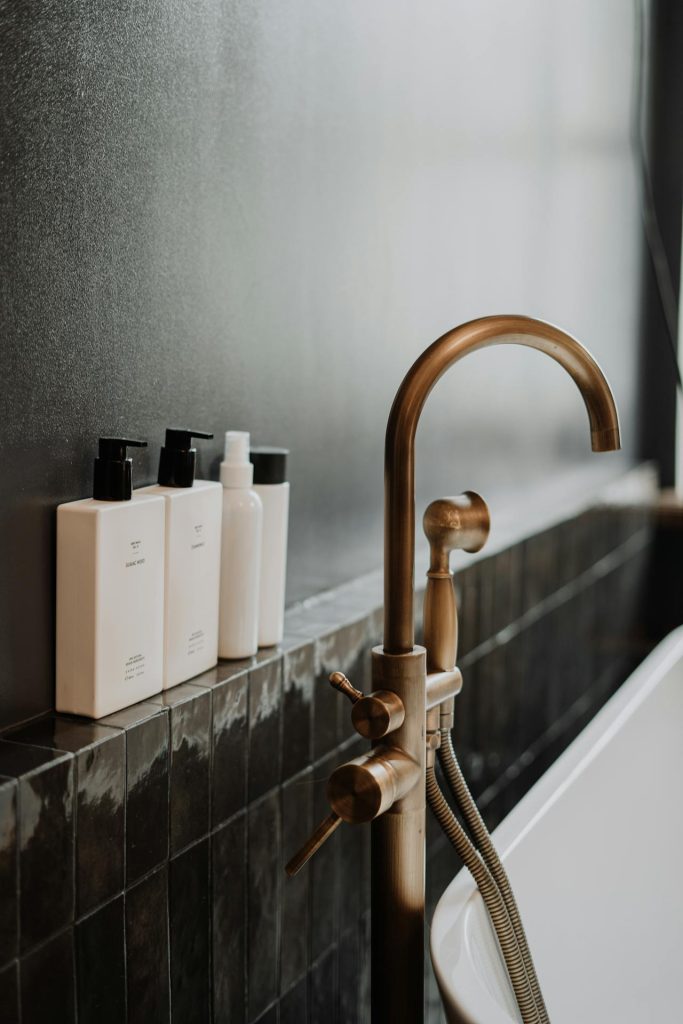
Choosing the right shower hose and fittings is crucial. This helps prevent leaks and extends the life of your shower setup. GONGGONG braided hoses are strong, durable, flexible, and tangle-resistant. They are suitable for both hot and cold water and fit most bathrooms.
When choosing a shower hose and fittings, consider the following factors:
| Feature | Description |
|---|---|
| Quality | Choose a drinking water safe hose. This ensures you are protected from harmful substances. |
| Length | Choose the right length for you. Most hoses are 63 inches or 80 inches long. |
| Material | Choose a durable, tangle-resistant, and easy-to-clean material. |
| Design | Choose a style that matches your bathroom. You can choose metal or plastic materials. |
| Connections | Ensure the hose matches your faucet. Most faucets use a 1/2-inch threaded connection. |
GONGGONG braided hoses are made of stainless steel, making them strong, durable, and rust-resistant. If you need a lighter hose, you can choose polymer or nylon materials.
Adapters are just as important as hoses. Here are some common adapter types:
- Threaded hose adapter: Fits most faucets and securely holds the hose in place.
- Universal quick-connect adapter: Easy installation without tools.
- Dual-thread adapter: Connects multiple devices simultaneously.
- Built-in filter adapter: Purifies water during showering.
- Aerated and non-aerated: Aerated hoses save water, while non-aerated hoses maintain a strong water flow.
Faucet adapters are used to connect hoses to bathtub faucets. Always check the faucet size and type before purchasing an adapter.
Note: Some shower hoses are made from recycled materials, which helps save water. Choosing the right hose helps reduce household water and energy consumption.
How to Add Shower Hose Step-by-Step
Identify Faucet Type
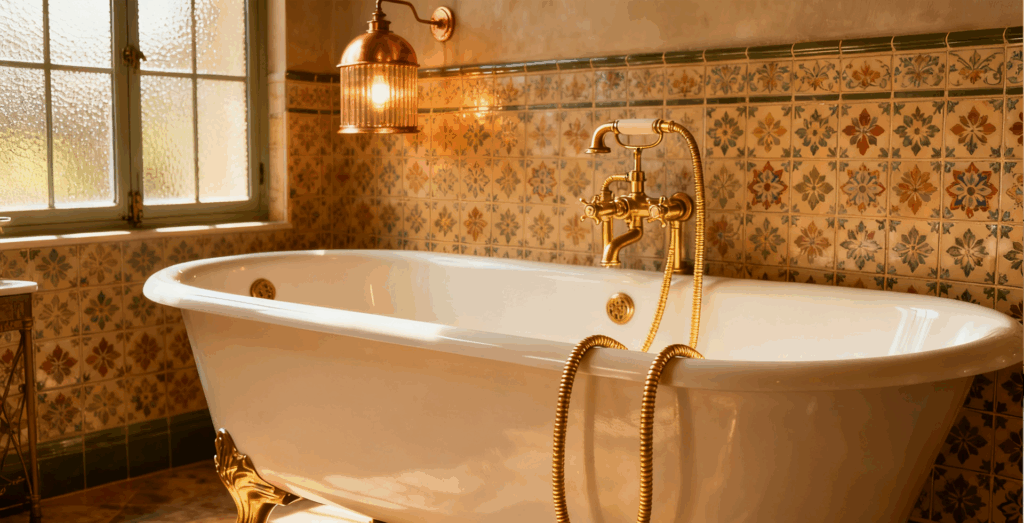
People see various types of bathroom faucets in their homes. The main types include basin faucets (available in single-handle and double-handle styles) and bathtub and shower faucets. Some faucets are wall-mounted, while others are installed on the edge of the bathtub. Wall-mounted faucets are typically used in conjunction with bathtub showers. Countertop faucets are suitable for freestanding bathtubs. The type of faucet affects how the shower hose is installed. Valve technology and installation space are also important. Before starting installation, you should observe the faucet and determine its type. This step helps in selecting the appropriate adapter and handheld showerhead.
Select Adapter and Hose
Choosing the right fittings and hoses is crucial for a successful installation. You need to measure your faucet size to ensure the fittings and hoses match. Here are the specific steps:
- Measure the outer diameter of the faucet thread using a ruler or calipers.
- Measure the inner diameter of the faucet’s internal thread.
- Check the nominal size, i.e., the standard pipe diameter.
- Measure the required length from the shut-off valve to the connection point.
- Read the water supply pipe size guide provided by the faucet manufacturer.
- Determine the connector type, such as a compression fitting.
After measuring, you can choose a fitting that matches the faucet. You should also choose a hand shower and hose that suit your needs. GONGGONG braided hoses are suitable for both hot and cold water, are less prone to tangling, and are easy to bend. This type of hose ensures a smooth flow of water to the hand shower. The fittings must match the faucet and hose. Please check the packaging to ensure the adapter matches your faucet and hand shower.
Install and Seal Connections
Plumbing experts recommend following these steps to install the shower hose to ensure a leak-proof seal. The main steps are shown in the table below:
| Step | Description |
|---|---|
| 1 | Disconnect the old hose, if there is one, using a wrench. |
| 2 | Unpack the new hose and find the two washers. |
| 3 | Press one washer into each coupling nut. |
| 4 | (Optional) Wrap plumber’s tape around the faucet threads. Screw the hex-nut end onto the faucet or diverter until snug. |
| 5 | Screw the conical-nut end onto the hand held shower head base until snug. |
| 6 | Turn the water back on and check for leaks. Tighten connections if needed. |
It is always recommended to use new washers and wrap hose tape around the threads. This helps create a strong seal and prevents leaks. It is recommended to tighten the connections by hand first. If more force is needed, pliers can be used, but handle them carefully to avoid damaging the hose or hand shower. GONGGONG braided hoses are flexible, tangle-free, and ideal for use in confined spaces. The adapter should seamlessly connect the faucet, hose, and hand shower. A good seal prevents water from leaking out of the hose, avoiding bathroom leaks.
Tip: Always check the water pressure. Most homes have a water pressure between 40 and 60 psi. Excessive water pressure can damage the hose and hand shower.
Shower Hose Test for Leaks
After installing the hose, check for leaks. You can do this by following these steps:
- Reconnect the water supply and check the connections.
- Check around the faucet, adapter, hose, and hand shower for drips.
- If a leak is found, turn off the water supply.
- Tighten the connections by hand or with pliers.
- Turn the water supply back on and check again.
Most leaks are caused by loose connections or missing washers. Sometimes, the hand shower or hose may be incompatible with the adapter. Users should always use high-quality fittings and check the seal at each step. If the leak persists, it can be repaired with sealant after drying. Proper installation ensures the hand shower works properly and keeps the bathroom dry.
Note: DIY users typically need about an hour to install this product. Taking the time to check each connection helps prevent leaks and ensures the handheld showerhead lasts for years.
Shower Hose Troubleshooting and Maintenance
Fixing Leaks
Small leaks can lead to big problems if left unaddressed. Users should check all connections after installing a new hose. If there is dripping at a connection, try the following steps:
- Check the gaskets for damage or wear. Replace the gaskets if necessary to improve the seal.
- Wrap thread-locking tape around the threads before tightening. This helps form a better seal and prevents leaks.
- Clean the showerhead to remove limescale, as limescale can affect the seal.
Ensure each connection is properly sealed to prevent water from seeping into the hose and into the bathroom. If the leak persists, check the connections and hose for cracks.
Ensuring Proper Fit
A good connection between the hose, connections, and faucet helps prevent leaks and maintain a seal. Before purchasing accessories, always measure the end dimensions of the faucet and hose and check for gaps at the connection points. If the hose feels loose, first tighten the nut by hand, then gently tighten it with pliers. Overtightening may damage the seal. GONGGONG braided hoses are made of high-quality materials and undergo rigorous quality control, giving users peace of mind regarding connectivity and sealing.
Regular Hose Care
Regular maintenance helps extend the life of your hose and keep it sealed well. Here are some tips:
- Using a shower filter reduces mineral buildup and impurities, keeping the seal clean and secure.
- Rinse and dry the hose after each use to prevent dirt and buildup around the seal.
- Avoid using harsh cleaning products. Natural cleaners protect the hose and seal.
- Deep clean the hose every few months to keep it clean.
High-quality braided hoses, such as those from GONGGONG, are more durable and flexible. They are less prone to cracking and maintain a steady water flow. Regular inspection and cleaning help maintain a good seal, resulting in a comfortable shower experience.
Installing a shower hose over your bathtub involves a few simple steps: First, prepare all necessary tools and accessories. Then, install the hose and fittings, ensuring all connections are secure. Next, turn on the faucet to check for proper function and leaks. Afterward, regularly check your installation and replace the shower head if necessary. A high-quality hose and careful installation help prevent leaks and extend the hose’s lifespan.
Regular cleaning and inspection of your shower hose will ensure it functions properly, allowing you to enjoy a comfortable shower experience every day.
FAQ
How do I determine if my shower hose fits my bathtub faucet?
You should measure the thread size of your bathtub faucet. Most shower hoses use standard sizes. Consulting your faucet’s instruction manual will be helpful. If unsure, you can take an old part to a store for comparison.
Can a shower hose be installed on any bathtub?
Most bathtubs can accommodate shower hoses. Some older bathtubs may require special adapters. Before installation, you should check the type of faucet and the space around the bathtub.
What shower hose length is best for a bathtub?
A 63-inch (approximately 159 cm) hose fits most bathtubs. For larger bathtubs, an 80-inch (approximately 203 cm) hose can provide a longer shower head length. The distance from the faucet to the desired shower head position inside the bathtub should be measured.
How can I prevent leaks when installing a shower hose on a bathtub?
New washers and hose tape should be used at all connections. Tighten by hand first. If a leak is found, gently tighten it with pliers. Check every joint around the bathtub to ensure a good seal.
How often should you check the shower hose in your bathtub?
You should check the hose and connections every few months. Checking for drips or cracks around the bathtub helps to detect problems early. Cleaning the hose will keep it in good working order and extend its lifespan in the bathtub.